Why Your RV Tanks Deserve More Attention
Most RV owners spend a lot of time thinking about engines, roofs, and electrical systems. The holding tanks? Those tend to get ignored until something goes wrong. And when something does go wrong with your black or grey tank, it is hard to miss – the odors are overwhelming, the sensors give false readings, and in the worst cases, a clog can make your toilet completely unusable mid-trip.
RV black and grey tank maintenance is one of those tasks that feels unpleasant to think about but is genuinely straightforward once you understand how the system works. This guide walks through the most common problems RV owners face with their holding tanks, how to troubleshoot each one, and what preventive habits will keep everything functioning the way it should.
If your RV also has water system issues beyond the tanks themselves, our guide on RV water system maintenance and leak prevention covers the broader plumbing picture from fresh water intake to drain.
How RV Holding Tanks Actually Work
Before jumping into problems and fixes, it helps to understand the basic layout of your holding system. Most motorhomes and campervans have three separate tanks:
The Fresh Water Tank
This stores clean water for use throughout the RV. It is separate from the waste tanks and feeds the water pump and plumbing fixtures.
The Grey Water Tank
Grey water collects all the wastewater from your sinks and shower. It does not contain solid waste, but it does contain soap residue, food particles, grease, and bacteria – all of which can cause significant odor and buildup if left unmanaged.
The Black Water Tank
The black tank collects everything that goes through the toilet. It requires the most attention because improper care leads to odor, clogs, hard pyramid formations, and sensor failure – all of which are covered in detail below.
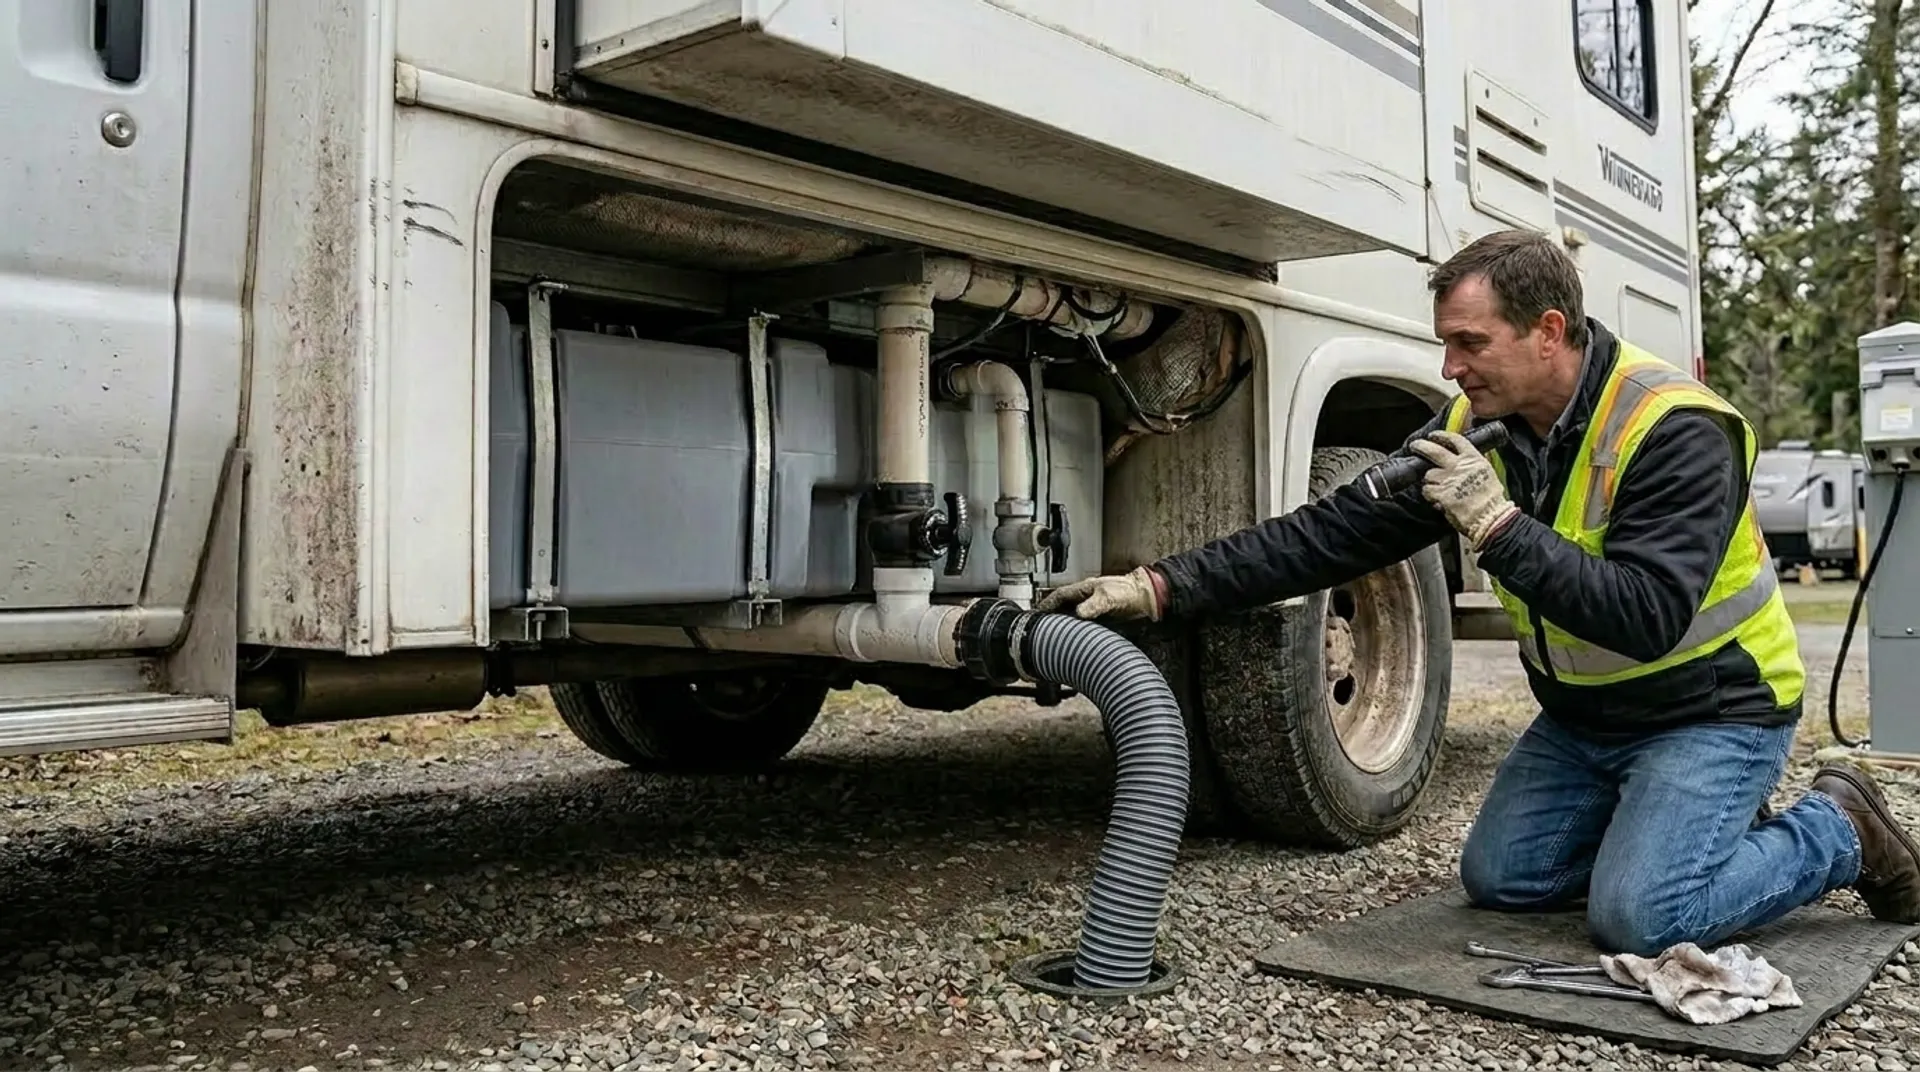
Both the grey and black tanks drain through separate valves, usually located at the rear or underbelly of the RV, connecting to a sewer dump station or campground hookup through a flexible sewer hose.
Common RV Tank Problems and How to Diagnose Them
Problem 1 – Persistent Tank Odors
A foul smell coming from your toilet or drains is the most common complaint among RV owners. Odors can originate from the black tank, the grey tank, or even a dried-out P-trap in a sink or shower that is not used frequently.
Here is how to narrow down the source:
- If the smell comes specifically from the toilet area, the black tank is the likely cause.
- If the smell comes from sink or shower drains, the grey tank or a dry P-trap is the culprit.
- If you smell sewage from the outside of the RV near the underbelly, check for a leaking drain valve seal.
- If the odor is strongest when the vehicle is moving or in hot weather, it may be a ventilation issue – the tank vent pipe on the roof may be blocked or undersized.
Fix: For black tank odors, always keep a few inches of water in the bowl and tank at all times. Use an enzyme-based holding tank treatment after every dump – these break down waste and neutralize bacteria rather than just masking the smell. For grey tank odors, flush the tank fully with clean water and add a grey tank deodorizer. For P-traps, simply run water through unused drains every few days to keep the trap sealed.
According to the CDC’s guidance on chemical agents in enclosed spaces, proper ventilation in confined RV interiors is critical to preventing harmful gas buildup, which is why a functioning roof vent pipe matters beyond just odor control.
Problem 2 – Black Tank Clogs and Pyramid Blockages
A pyramid plug is exactly what it sounds like – a solid mound of waste that builds up directly beneath the toilet opening in the black tank, usually caused by too little water use or dumping the tank when it is nearly empty instead of full.
Signs of a clog or pyramid plug include:
- Slow or no drainage when you open the black tank valve
- Gurgling sounds when flushing
- The toilet will not flush properly
- Liquid drains, but solid waste remains
Fix: Fill the black tank with water – close the valve, fill through the toilet or a tank flush inlet, and let it soak for several hours or overnight. Adding a tank softener or ice (the motion of driving breaks up solids) can help loosen stubborn blockages. If the clog persists, a tank wand connected to your freshwater hose can be inserted through the toilet to blast away the blockage directly. The RV Dealers Association consumer tips page recommends using plenty of water with every flush as the single most effective prevention method.
Problem 3 – Faulty Tank Level Sensors
This is perhaps the most universally frustrating RV tank issue. You dump the tank, rinse it thoroughly, and the sensor panel still reads full or shows a random level that makes no sense. Faulty tank sensors are almost always caused by waste or residue that has built up on the sensor probes inside the tank wall.
Sensor probes work by detecting the electrical conductivity of liquid between them. When waste coats the probes, they read as wet even when the tank is empty – giving you a permanently inaccurate reading.
Fix: After dumping, flush the tank multiple times using a built-in tank flush system or a tank rinser wand. Then add a full tank of water plus a specialized sensor-cleaning treatment and drive for a while to slosh the mixture around. Let it sit overnight if possible before dumping again. Repeating this process two or three times usually clears enough residue to restore accurate readings. In stubborn cases, a manual wand flush directly through the toilet is the most effective mechanical option.
Understanding how your tank sensors interact with your dashboard warning system can help you interpret other false readings. Our guide on understanding RV warning lights and dashboard indicators explains what to trust and what to double-check when something looks wrong on your monitor panel.
Grey Tank Maintenance – Often Overlooked, Always Important
Grey tanks are frequently neglected because owners assume that soap and water from the sink and shower cannot cause serious problems. In reality, grey tanks develop significant grease buildup, food debris accumulation, and bacterial growth that eventually rivals the black tank for odor severity.
Grease Buildup and Slow Drains
Washing dishes in the RV sink sends cooking grease, oils, and food particles directly into the grey tank. Over time, grease coats the interior of the tank and the drain lines, slowing drainage and trapping bacteria that produce strong odors.
Prevention: Wipe cookware with a paper towel before washing to remove excess grease. Use an enzyme-based grey tank treatment just as you would for the black tank. Never pour cooking oil or fat directly down the drain.
Drain Line Blockages
Hair from the shower and food particles from the sink are the main contributors to grey drain line blockages. These can occur in the drain line between the fixture and the tank, making them harder to flush out with tank treatments alone.
Fix: Use a drain strainer in your shower to catch hair before it enters the system. If a partial blockage develops in the drain line, a hot water flush combined with an enzyme cleaner often breaks it down. Avoid using standard chemical drain openers – many contain compounds that damage RV plumbing seals and tank liners.
Dump Sequence Matters
Always dump the black tank first, then open the grey valve to flush residue from the sewer hose. This keeps the connection point cleaner and reduces odor during the dump process.
Preventive Maintenance Habits That Make a Real Difference
 Most RV tank problems are preventable with consistent habits rather than reactive repairs. Here is what makes the biggest difference long term:
Use Enough Water
The number one cause of black tank clogs and sensor problems is not using enough water. Every flush should use a full bowl of water. When first filling the tank after winterization or a dump, add several gallons of water before use.
Choose the Right Tank Treatment
Enzyme-based and bacterial treatments genuinely break down waste and are safe for tank sensors and seals. Avoid formaldehyde-based treatments, which are now banned at many dump stations and can damage holding tank components over time. The EPA’s guidance on waste system care aligns with RV best practices – biological treatments are safer and more effective for breaking down organic waste.
Flush Thoroughly at Every Dump
A quick dump without a rinse leaves residue on tank walls and sensors. Use a built-in tank flush port or a tank wand to rinse until the water runs clear before closing the valve.
Keep the Black Tank Valve Closed
This is a mistake many newer RV owners make at full-hookup sites – leaving the black valve open so it drains continuously. This causes liquids to drain out while solids stay behind, creating the exact conditions for a pyramid plug. Only open the valve to dump when the tank is at least two-thirds full.
Inspect the Drain Valves
Drain valve seals can crack or tear with age, leading to slow leaks, odors, and cross-contamination between tanks. Inspect the blade and seal condition each season. Replacement valves are inexpensive and straightforward to install. Keeping up with this kind of seasonal inspection is part of a broader preventive care routine – our article on preparing your RV for long-term storage outlines the full seasonal checklist, including tank care before and after winter storage.
When to Call a Professional
Most tank maintenance and troubleshooting can be handled by the owner. However, a few situations call for professional help:
- A clog that does not respond to multiple water flushes and soaking treatments
- A cracked or leaking tank body, rather than just a valve seal
- Sensors that still read inaccurately after repeated deep cleaning – sensors can sometimes be replaced without replacing the full tank, but the access and wiring work often requires a technician
- Persistent odors that cannot be traced to the tank or vent system may indicate a more complex plumbing issue
Electrical problems can also affect how your tank monitor panel functions. If your sensor panel is giving strange readings across multiple systems, not just the tanks, review our guide on common RV electrical problems and how to diagnose them to rule out a wiring or converter issue before pulling the tanks apart.
A Well-Maintained Tank System Means a Better Trip
RV black and grey tank maintenance is not the most glamorous part of ownership, but it is one of the highest-impact routines you can establish. The owners who stay consistent with water use, proper treatments, full flushes, and seasonal inspections rarely deal with the serious problems – clogs, pyramid plugs, overwhelmingly bad odors, and sensor failures – that make camping miserable for those who let maintenance slide.
Treat your tanks with the same attention you give your roof or your electrical system, and they will work reliably for years without drama. For more practical guides across all RV systems, explore the Heartland RV Repair Library, where we continue to add troubleshooting and maintenance content for every type of motorhome and campervan.